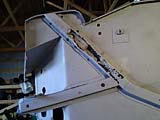
This the original condition of the hatchannel under the driver floor after sand blasting. As you can see, it's rotten. Hatchannels are spotwelded to the sheet steel floor.
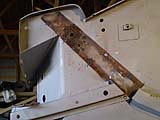
In this photo, I have removed the rotten hatchannel. If you look close, you can see where I cut the spotwelds in order to remove the hatchannels. The rust you see was superficial and easy cleaned up.
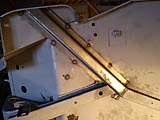
Here is the new hatchannel tack welded in place. I will do more welding on butt joint at the end of the new hatchannel to attach it to the old one. I will also grind the welds to make them smooth and flush with the surface.
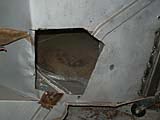
The passager floor had many pinholes and weak spots. I cut out a large patch using my grinder and a cut-off wheel. I used the old steel as a pattern to cut the new steel replacement panel.
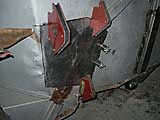
In this photo, I'm using magnets and clamps to hold the new steel in place while I check sizing, and alignment of all edges. I made the clamps out of scrap steel, machine screws, and box tubing. Once I had the edges tightly aligned, I spot welded the panel about every three inches along the seam.
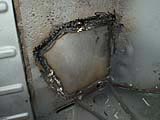
In this picture, the patch is welded in place. Some of the welds are very rough and will require considerable grinding. If you look above the patch, you can see how rough the original floor steel panel was. I used a copper backing plate to help me butt weld the patch to the floor. The copper plate helped prevent me from burning through the gap between the floor and the patch.


