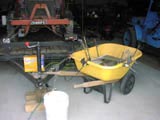
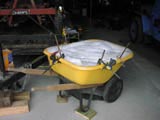
Tools for electrolysis: plastic wheelbarrow, rebar stakes, 10 amp battery charger, Arm and Hammer Washing Soap, 5 gallon plastic bucket, measuring cup, lots of wire, water, and rusty gas tank.
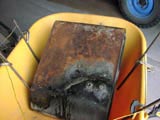
This is a "before" photo of the rust on the bottom of the tank. It also shows loose paint, grease, and dirt. We will see how much of this the electrolysis will remove.
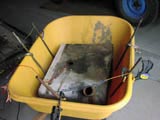
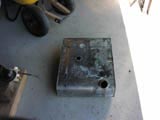
This ia a "before" picture of the top of the gas tank. I used the wheel barrow for the gas tank electrolysis because I could keep the gas tank completely submerged in the water/soap solution. I clamped the rebar to the plastic wheelbarrow so the rebar would not touch the gas tank. I connected all the rebar together with 14 gauge wire. I made sure the gas tank was level so air bubbles inside could escape through the filler neck.
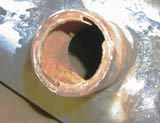
This is another "before" photo of rust scale in the filler neck of the gas tank.
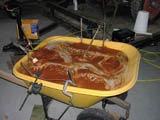
This is what it looked like when I filled the wheelbarrow with the soap and water solution. What I learned from this, is add the 1/3rd cup of soap to the 5 gallon pail of water. If you add the water to the soap, you get way too much foam.
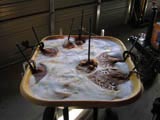
This is what it looked like after 2 hours of electrolysis. You can begin to see the rust rising in the bubbles around each of the rebar sticks. Electrical current used was 5 amps from the battery charger.
This is the rebar stick after 12 hours. Rust and paint slime had made a complete covering of the rebar, but limited the electrical contact that was available. Electrical current was down to less then 2 amps from the battery charger. At this point, I wiped off each rebar before setting them back into the mix. I wore vinyl gloves to protect my skin from the soap water solution and the rusty slime.
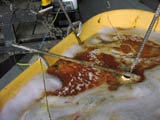
This is what is looked like after 18 hours. I decided to add 2 rebar inside the tank to attract the rust from the side. I had to partially insulate them with PVC pipe to keep them from touching the edge of the tank openings. I put rubber hose on the ends of the rebar to keep them from grounding out on the tank bottom.
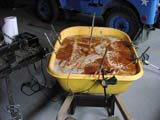
This is what the vat looked like at 24 hours, immediately before I removed the tank.
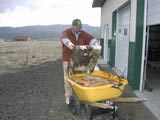
Here I am pulling the tank out and getting the first good look since I put it in.
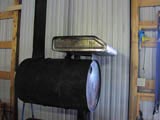
After I removed the tank, I rinsed it off with lots of fresh water. Then put it on top of my barrel stove to heat it up and dry it faster. By doing that, I avoided getting flash rust on the areas that had been rusty.
This is the "after" photo of the bottom of the tank. It is easy to see where the rust had caused pitting in the surface. This is the area that had many pinhole leaks. The old paint and grease was almost completely removed from the outside of the tank.
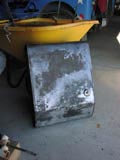
This is the "after" photo of the top of the tank. Most of the paint is gone, and so is the grease. My one mistake was using a solid plastic pipe to cover the rebar that went down into the filler neck. Because of the pipe, the filler neck did not get cleaned like the rest of the tank.


